      |
|
||
|
|
||
When you launch QCad, it comes up with the main application window of the graphical user interface. This chapter gives an overview over the different sections of the main application window.
Some of the components of the main application window are also commonly available in other applications (e.g. the menubar or the toolbars). Other components are specific to CAD or even to QCad only. Figure 8 shows the names by which this manual refers to the individual components of the QCad user interface.

Figure
8: Main application window of QCad.
Most functions of QCad can be accessed from its menu at the top. For CAD related functions it might be more convenient to use the CAD toolbar at the left. This toolbar always shows the functions which currently make most sense to use. For example if you are about to set the startpoint of a line it shows the snapping functions which allow you to set the startpoint to an existing endpoint, a grid point or to use another positioning mode.
To the right of the main window of QCad you can find the layer list and
the block list. They list the layers and blocks of the currently active
drawing and offer some basic tools that are layer or block specific.
You can switch the lists on and off using the menu
View - Views - Layer List and
View - Views - Block List.
The status bar at the bottom of the application window shows various
information about the current status of QCad. At the left, the coordinate
widget displays the absolute and relative position of the mouse cursor as
cartesian and polar coordinates. The mouse widget in the middle shows
information about the current function of the left and right mouse buttons.
The selection widget at the right shows the number of entities that are
currently selected.
The status bar can be enabled / disabled using the menu
View - Views - Statusbar.
Just above the status bar you can find the command line of QCad
(Professional version only). It is used to type in commands and to notify
you about warnings and errors.
The command line can be enabled / disabled using the menu
View - Views - Command Line.
The option toolbar is empty in Figure
8.
Depending on the currently active
tool, it shows the options that are available for the tool.
If you prefer to change options and tool settings over the command
line, you might want to hide this toolbar using the menu
View - Views - Option Toolbar.
Every action in QCad depends on a command being issued first. There are three different ways to execute QCad commands:
Most actions require further user inputs after being launched. There are three ways how those inputs can be requested by QCad:
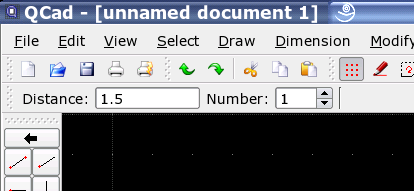
Figure
9: An optional toolbar may be shown
for some tools.
QCad operates in two modes: the command mode and the normal mode. In the command mode, it accepts commands over the command line. In normal mode all keyboard input goes to the application interface.
The command mode is indicated by a blue label at the left bottom corner
of the command widget and a blinking cursor in the command line. In this
mode, all keyboard input that is printable, goes into the command line. Use
this mode to enter commands or coordinates. E.g. you can enter
line to launch the line tool. If you press the
Z key followed by the
A key, the letters 'za' appear in the command line as opposed
to triggering the auto zoom command. If in normal more, you can enter the
command mode by pressing the space key or by clicking into the command line
input field.
In this mode, QCad behaves as any other standard application. All
keyboard input is interpreted as hotkeys if specified or has no effect at
all. If you press the
Z key, followed by the
A key in this mode, QCad triggers the auto zoom command. To
switch from command mode to normal mode, press the Escape key. If there is
some text in the command line input field, you need to press Escape twice.
|